Where my stitches at?!

I want to start a series that will probably last for the next few weeks to highlight some basic and not so basic crochet stitches. I also want to talk about some of the different types of fabrics that can be made by combining these stitches. One thing I hear a lot is that some crocheters can’t seem to get the hang of working from pattern. I can seem how a pattern, when looked at as a whole, can seem intimidating and difficult. What I find to be the best way to look at even the most advanced of patterns is to just take it a row at a time (or round) and just follow the stitch. Trying to work from this perspective helps break down to pattern process.
The first stitch I want to show how to accomplish is the half double crochet (or HDC). This is my favorite stitch, especially for hats, because for me I can work it faster. I don’t know why that is, it’s just always had the best flow when working HDC in the round especially.
20140427-112639.jpg
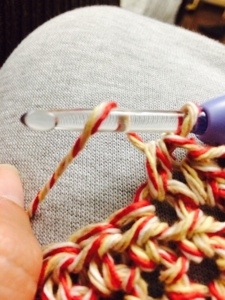
The first step to complete a HDC is to begin with the loop on your hook from the previous stitch or the chain from the previous row and yarn over once.
20140427-112754.jpg
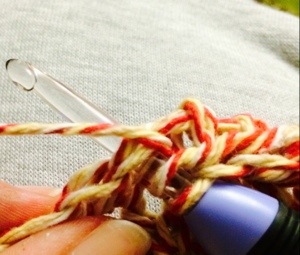
Next you will insert your hook through the stitch you are working in.
20140427-112837.jpg
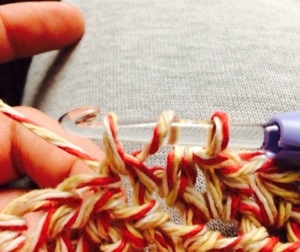
The third step is to pull a loop back through the stitch you are working in which leaves you with three loops on your hook.
20140427-112940.jpg
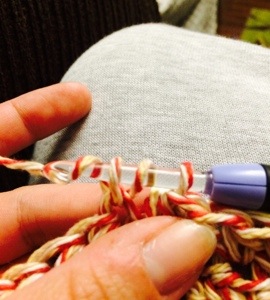
The final step is to yarn over one last time and pull through all three loops on your hook.
20140427-113029.jpg
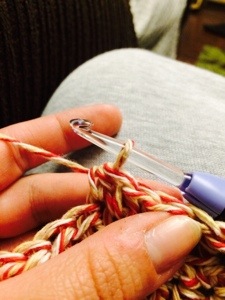
You have now completed your half double crochet stitch.

20140427-113106.jpg

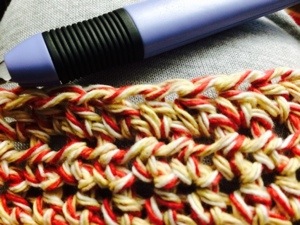
The one thing to remember is that all of those fancy patterns and techniques are really just a combination of the basic stitches of crochet. Don’t let any pattern intimidate you. Happy crocheting!
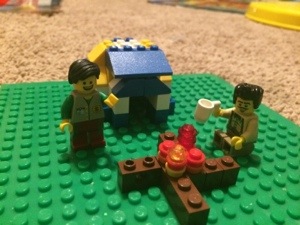
Camping outside


Spring has finally sprung and this girl is ready for some out-door activity. I have been cooped up in the four walls (well maybe more than four) all winter long, and it was a long one let me tell ya! This winter didn’t seem like it would ever end, we had a record number of snow days this year.

No more shall we suffer through another cold icy night with nothing to warm us but the fire. Ok, so that only happened one time, but still…it makes you appreciate the fact that you crochet warm fuzzy things. Am I right?

My husband and I have talked about taking my son camping before, but the idea of a small toddler toddling around an open flame just didn’t sit well with us. We put it off. I think the best starter would be a hiking day, and then after a few of those we can think about camping. THE GREAT OUTDOORS, HERE WE COME!!

And yes, I will be taking my hook and yarn…no electricity needed for that!

20140421-102834.jpg

Headgear

Covering the ears is one if my main goals when making any kind if head wear. I think it stems from being a kid; I always had to have my ears covered, even in the bath tub because of my frequent ear infections. I do it to my son too, “Cover those ears!”
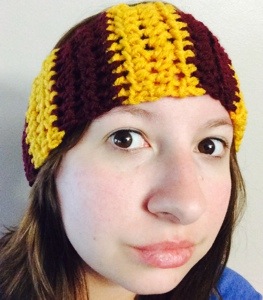
I recently made a batch of requested head wear for a few folks and one of them is a headband. I know I’ve talked about headbands already, but this one is my own pattern so I thought I would share with you how to make your own. It is a great ear warmer!!

The materials that you will need are:

H hook

Worsted weight yarn, two colors if you want strips like mine

Scissors

Yarn or tapestry needle


Here’s the pattern:
Ch 10
Row 1: HDC In third ch from hook and HDC in each ch across, ch1 and turn (8HDC)
Row 2: HDC across, ch1 turn.

Continue until you reach the desired size to snuggly fit around your head. When the desired length is reached do not tie off! Simply ch1 and turn the work as if you are going to start another row, but instead hold the two ends together and slip stitch across. Then tie off the end and weave in ends. If you want stripes like mine, I switched color every third row. To ensure a smooth color change make sure you finish the last stitch of the row before you intend to switch by pulling up the new color when you have two loops on your hook.

Happy crocheting!

20140420-084011.jpg

I’ve been every where, man

This week I went on a small family trip that took about four driving hours to each our intended destination. The little town we went to was tiny and had next to nothing in the way of entertainment, food options, or lodging. We visited this little hole in the country because my husband had just completed a thirteen week training program and he is finally finished so we went to see the finishing ceremony.
So, while I was in the middle of Nowheresville trying to kill time I, as any crocheters or knitter worth their salt would, found a way to kill some time by working on my crochet. As I was sitting in our little hotel room crocheting away I started thinking about this new movement if tagging public areas with crochet or knitting called yarn bombing. I, being the law abiding citizen I am, have never been brave enough to do something so bold. But I have seen some work put up by others, and it always seems to brighten its surroundings. So since I am too chicken to doing my own yarn bombing (kudos for thinking about it though!) I want to tip my proverbial hat to those crocheters and knitters out there that have participated in such a beautiful and thrilling task. May your works of art forever brighten our world!

20140412-142746.jpg

Use the force

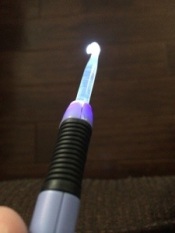
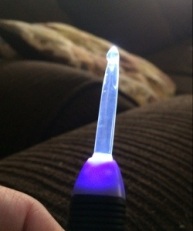
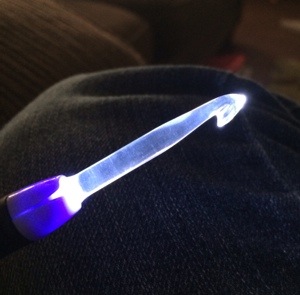
I have been reading some of those “coolest weird things ever invented” and I thought I would share my “cool weird” crochet hook that I bought a few years back. My favorite crochet hooks, as you may have read, are the Clover brand ergonomic hooks. They are just so comfy to work with, and my hand doesn’t cramp up like out does with the pencil thin hooks. One day I wanted to start a new project but couldn’t find my H size Clover hook. Imagine my sadness when I went to my local hobby store and couldn’t find a replacement. What I did find however, is a light saber type hook called The Crochet Lite. This nifty little thing has about the same size handle as my beloved Clover hooks with a comfy grip. Also, IT LIGHTS UP! How cool is that? I can’t say that I have found much practical use for the light, except one bought of crocheting while waiting in the car for about twenty minutes around sunset. Once it got completely dark though, it didn’t light enough of an area to feasible work with. Too much eye straining.
So, there is my contribution to the list of cool weird inventions. I’m Star Wars sure somebody somewhere was watching  while crocheting a blanket in the light of the movie and suddenly thought the idea if a light saber crochet hook would be awesome.

20140410-105608.jpg20140410-105617.jpg

20140410-105632.jpg

My stash

20140331-192151.jpg

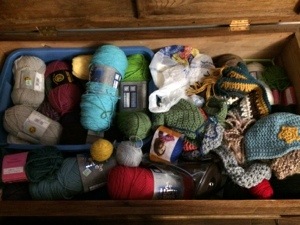
Every yarn artist (that’s what I like to call myself) has a dirty little, not so secret,  problem. Yarn addiction. It’s a real thing people. The picture up top is of my yarn stash. I can’t seem to control myself. Granted I so not put myself in debt over it, and I haven’t taken a second mortgage on the house, but every time I think of a new project I want to start I just don’t seem to have the right yarn for it. Even with the huge stash of random yarn bits, I never have the right one. I need the right color, oh and I never seem to have any bully yarn when I need it, and I can’t very we’ll make a baby hat with wool now can I? See what I mean? Any excuse to go out and buy yarn is good enough for me. My loving husband even picks up a skein every once in a while just to be sweet, kinda like flowers.

The stash you see is stored in a wooden quilt box my Daddy made sometime around the time I was born, and it is in my living room, and full of that sweet, sweet yarn.
So, my fellow crocheters and knitters out there, you are not alone. There are kindred spirits out there and you have found one in me. LONG LIVE THE YARN STASH! And may it never run low!


Brainstorming with T-shirt yarn!

1911033_10151964514820754_1493978566_o

In my last post I talked about how to make t-shirt yarn. Make as much as you want and tie the ends together to make a big long strand.Also keep in mind that you can use any kind of scrap fabric including sheets and left over fabric from other projects. Get your moneys worth out of that old stuff you bought and wore out! There are lots of patterns that are great for t-shirt yarn. It tends to be more sturdy and most shirts are made mostly of cotton so what you make is going to be good with water. Lets take a look at just a few ideas as to what can be made with this awesome up-cycled and earth friendly yarn!

Dishrags: since the t-shirt yarn is durable and cotton is not ruined with water it would be great for this.

Rugs: this is a very common use for t-shirt yarn. There are many different styles and techniques that can be used to make rugs. I think these types of rugs are called “rag rugs” and they have a rich history and have been in homes for a couple hundred years. Oldie but a goodie.

Bowl: again, since t-shirt yarn is sturdy it helps the bowl hold its shape better.

Jewelry: yes, bracelets and necklaces can be very cute made form t-shirt yarn

Bags: this yarn makes great bags, especially for toting home groceries or to the pool or beach.

Scarf: there are many different ways to make scarves from t-shirt yarn.


This is a very short list of the many things that can be made from this versatile yarn. So clean out your closets, your linen cabinets, and your drawers to make some yarn!! This especially great for someone that doesn’t have the money to buy lots of yarn.


T-shirt Yarn

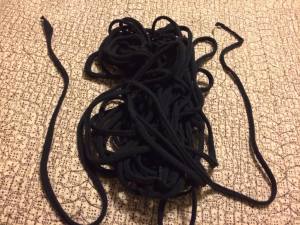
I have been wanting to work with t-shirt yarn for a while but I just haven’t seem to be able to get to it for whatever excuse of the day happens to be. Well, I will put it off no longer. Here are the instructions for making t-shirt yarn. Luckily I have a husband with a love of t-shirts and he wears the same color most of the time. He also likes to buy Hane’s black pocket t’s in packs of eight which unfortunately shrink over time. This means that they are eventually cast aside and they end up in my scrap pile for later projects.

Things you will need to make t-shirt yarn:

Scissors, fabric cutting wheel, X-Acto knife capable of cutting fabric, or something similar that will cut the t-shirt fabric.

T-shirts, enough to make whatever your project and preferably cotton or mostly cotton because it stretches easier.

1891502_10151964514465754_70953343_o

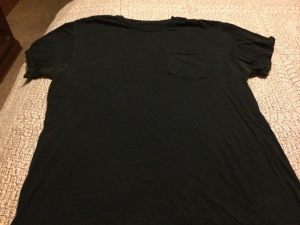
Here is the t-shirt laid out. Try to get it as flat as you can and not all folded and uneven. If it is not flat enough it will not cut as evenly.

1800082_10151964514460754_1734494787_o

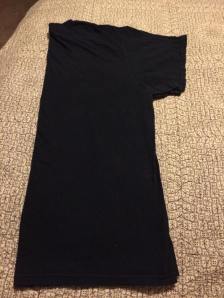
Fold the t-shirt in half. It doesn’t matter if it is folded with the front facing out or the back. Just fold it in half with the sleeves together.

1799897_10151964514445754_382052776_o

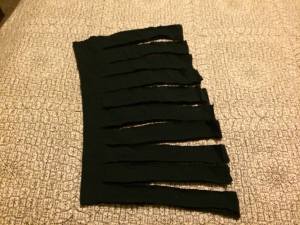
Next you will start by cutting off the hem of the shirt. Then start cutting it into strips that are about 1 1/2 to 2 inches wide leaving about two inches or so uncut in the middle. When you reach the arm pit of the shirt go ahead and cut all the way across to cut off the top completely.

tshirt yarn cut 1

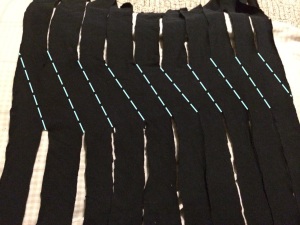
After cutting all the way up the shirt pull it apart and lay it over your arm or a piece of card board, just something that will allow you to cut the strips. Start by cutting at one end diagonally from the edge to the first cut. Then cut from the next bottom slit to the next top slit diagonally. Continue in this manner using the picture above as a guide; cut where the dotted lines are.


tshirt yarn cut 2

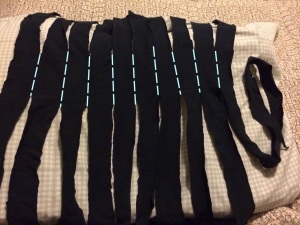
Next you will flip the shirt over to the other side and cut straight lines from one slit to the next.


1781010_10151964514800754_1192217342_o

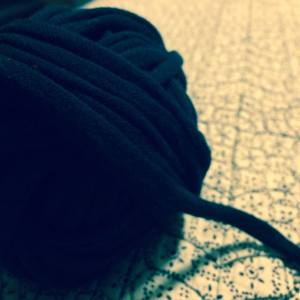
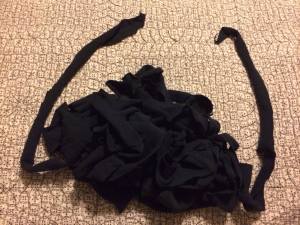
This is what your t-shirt yarn will look like. Depending on what you are making you might want to leave it in this state but I am not going to leave it like this. Holding one end of the yarn, pull a section taught and allow it to curl in on itself. Move down to another section and pull it taught again. Keep going until you reach the end. You can actually go over it again to make sure it is even, I did.


10001248_10151964514810754_1222241601_o


This is what the finished product will look like. See how it is thinner and there actually looks like there is more there because with it stretched out it is lengthened a little.

I’m not sure quite yet what I am going to make so I will cut up quite a few more t-shirts to make sure I have enough. I unfortunately don’t have a lot of color variety. A good way to get some variety is to hit up some thrift stores or garage sales and get some of those bright t-shirts with ugly designs printed on them that nobody wants. You don’t need the design, just the colors…oh the possibilities!

Finding patterns

As any crocheter knows, one can’t have too much yarn, too many hooks, or too many patterns. Books are great to find patterns and I have found many beautiful patterns in them, unfortunately what tends to happen is you buy a book for around $25 and only find one or two patterns inside that you like or will actually use. I have found a few books that I adore cover to cover, but they are few and far between. Thus the beauty of the internet; it is the biggest data base in the world after all. There are several sources that can be utilized on the world-wide web to find patterns for free or to pay the creator directly (and I like the idea that my money is going to the person that created the pattern and not their publisher).

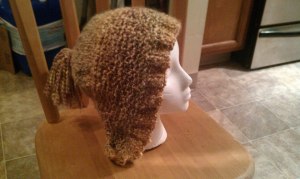
Ravelry.com is my main source for patterns. It is basically the mecca of all knit, crochet, and now loom patterns. Most bloggers post their patterns on Ravelry and link to the blog post it originates from, so do yarn companies, professional designers, and there are patterns from books and magazines as well. One of the great things about this site is the way you can search for a pattern: select what your craft is, the size you are looking for, how much you want to pay (or free), what item you want, the size yarn and needle/hook, and much more specific info. Also you can see other member’s completed patterns when they post pictures and most of them will post comments along with the photos as to how well the pattern worked up and if they made any changes. I know there are many other sites out there like crochetme.com and even etsy.com but Ravelry takes the cake in my opinion. I can lose myself for hours. My queue, yes you can create a queue to save the patterns you plan to make, has reached triple digits I think.knitted hood hat

Making it my own

The scarf I am making is just a little different than the scarf I saw in the store that I liked. That’s the beauty of making your Owen accessories and such, you can make them just the way you like. I decided to go with all knit stitch instead of purl and knit because I love the look of the knit stitch. Also I went with a more neutral color because I am forever making things in bright pretty colors to find that I can’t wear the finished product because it doesn’t go with anything in wardrobe. Below is a picture of the scarf I saw in the store. It is pink and has a weirdly large lacy motif on one end and I really don’t like that. I’m not quite finished with my scarf; they always take me a while to finish because they are so long and I can only work on my crochet it my spare time. I am ready to be finished with it though because we are experiencing record breaking cold and it would be nice and warm.