Where my stitches at?!

I want to start a series that will probably last for the next few weeks to highlight some basic and not so basic crochet stitches. I also want to talk about some of the different types of fabrics that can be made by combining these stitches. One thing I hear a lot is that some crocheters can’t seem to get the hang of working from pattern. I can seem how a pattern, when looked at as a whole, can seem intimidating and difficult. What I find to be the best way to look at even the most advanced of patterns is to just take it a row at a time (or round) and just follow the stitch. Trying to work from this perspective helps break down to pattern process.
The first stitch I want to show how to accomplish is the half double crochet (or HDC). This is my favorite stitch, especially for hats, because for me I can work it faster. I don’t know why that is, it’s just always had the best flow when working HDC in the round especially.
20140427-112639.jpg
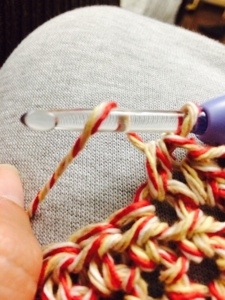
The first step to complete a HDC is to begin with the loop on your hook from the previous stitch or the chain from the previous row and yarn over once.
20140427-112754.jpg
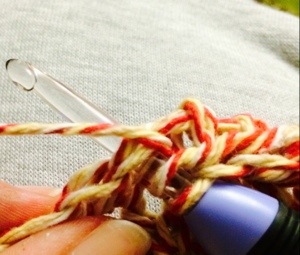
Next you will insert your hook through the stitch you are working in.
20140427-112837.jpg
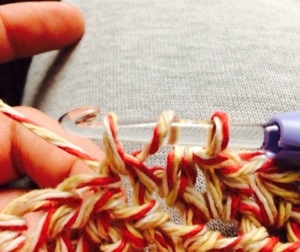
The third step is to pull a loop back through the stitch you are working in which leaves you with three loops on your hook.
20140427-112940.jpg
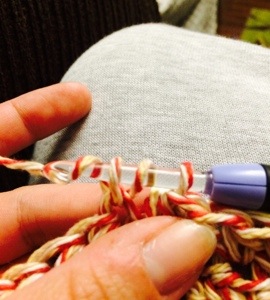
The final step is to yarn over one last time and pull through all three loops on your hook.
20140427-113029.jpg
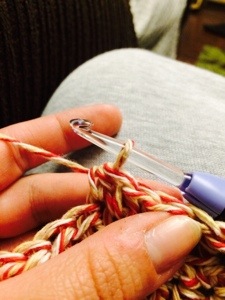
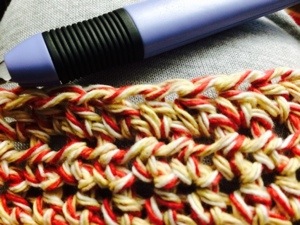
You have now completed your half double crochet stitch.

20140427-113106.jpg

The one thing to remember is that all of those fancy patterns and techniques are really just a combination of the basic stitches of crochet. Don’t let any pattern intimidate you. Happy crocheting!
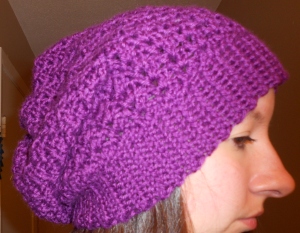
The Slouch Hat

Hats are about as versatile as any other piece of clothing, and making your own is a great way to go. There are many different styles to choose from and many different options for the different kinds. Beanie, top hat, ball cap, elf hat, Santa hat, the list goes on. One hat that seems to be very popular right now is the slouch hat. There is a hat that I have made many times over the past few years that is very popular among my friends and family. I have given it away to many loved ones in a rainbow of different colors. The most popular is black. I thought I would share the pattern for my most requested slouch hat. One issue I have found though is that the hat tends to get a little heavy depending on the yarn used to make it. It is my go to hat on a cold rainy day, somehow the bagginess helps keep the rain out of my face.

Urban Revival by Vickie Howell over at Caron Yarn Co. and Yarnspirations (which Caron is so light it would be a good yarn choice for this hat)

DSCN0701

Procrastination

I am guilty of procrastination. It’s true. I find a pattern, go buy the yarn (because I never have the RIGHT yarn in my stash), start working on it, put it down, and then think about working on it, but I tend to leave it sitting there. I’m a horrible crocheter! One thing I try to make myself do every once in a while (maybe one a year if I’m lucky) is go through and finish up projects of whims past. Pick up that scarf I started last winter and knock it out. Finally finish that arm warmer’s partner. Frog the hat that I don’t like the color of anymore. It’s that time of year, Spring cleaning time. It’s time for me to visit the island of unfinished projects. Do you have any floating around that you can’t seem to get finished?


1058807_10151474550115754_517446910_o

Yes, this is knitted, and double pointed at that, but I started it in August but haven’t finished it, so it definitely counts.

5 Healthy Habits for Crocheters

I know what you are all probably thinking, “Healthy crochet? I just put a hook in my hand and start working, what can be unhealthy about that?” Well, some of you may already know this, but crochet can lead to carpal tunnel, back pain, neck pain, head aches, and sometimes even eye strain. It is the same as writing, typing, working with hand tools, or anything else that uses repetitive motion of the fine motor muscles. I know I know, I don’t want to be the Debby Downer that rains on your parade, but there are some simple steps you can take to help keep yourself pain-free and healthy while working on your crochet.

1. Make sure you are sitting in a position that doesn’t strain your back. Crocheting in bed can be very relaxing, I’m guilty of this, and you tend to want to lounge around and get in a good comfy spot to start working while you watch T.V. That’s ok, as long as you keep good posture and don’t have to look down constantly, which brings me to my next point.

2. Don’t look down constantly. Try to keep your work at a level that you can easily look at without moving your head downward. It’s the same as reading, if you keep your head down for a long period of time you can eventually start to get tension headaches from the constant strain on those muscles.

3. Don’t move  your wrist too much. It may take some practice, but teach yourself to crochet with as little movement as possible. Beginners may have a hard time with this, but you don’t want to have to work too hard to move your hook or keep your yarn coming, that can contribute to carpal tunnel.

4. Keep the lighting at a good level. Remember when your mother used to tell you not to read in the dark because it would strain your eyes? Well, turns out that there is some truth to that, and when you are working on a pattern that takes some focus and concentration you need to make sure you keep the lighting bright enough that you can see without straining your eyes.

5. Take breaks. I can sit down to work on a project and end up crocheting for hours without even realizing it. Time flies when you’re having fun! So, make sure you give yourself regular breaks. If you feel your hands or wrists start to get tired, put down your hook and yarn and walk away from it for a couple of hours, your body will thank you.


20140423-084325.jpg

Earth Day: Plarn

20140422-120310.jpg

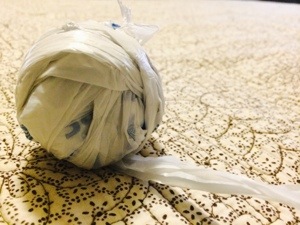
In the spirit of Earth Day I am going to share with you how to make plarn, yarn made out of plastic shopping bags. Plastic shopping bags end up floating in the ocean and lakes of the world and help fill the landfills of the country. Something we can do to reduce out carbon foot print is to reuse things that would normally be throw away. Reduce Reuse Recycle!

20140422-115351.jpg
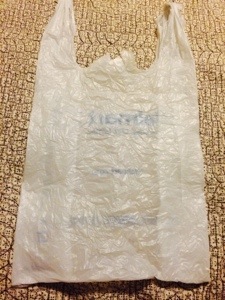
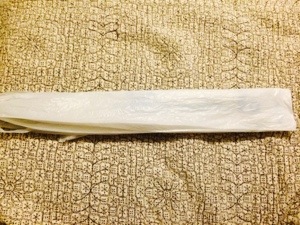
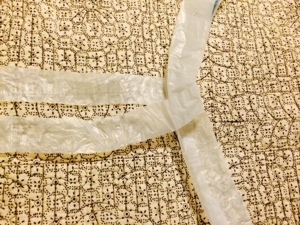
Step 1: Neatly stretch out a plastic bag making sure to fold in the sides the way they are made to be.


20140422-115527.jpg
Step 2: Fold the bag in half long ways twice.


20140422-115616.jpg
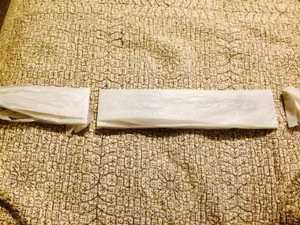
Step 3: Cut off the top and bottom of the bag.


20140422-115701.jpg
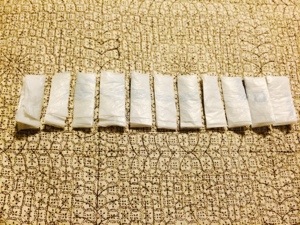
Step 4: Cut the bag into 1″ – 2″ strips.


20140422-115747.jpg
Now you have circular strips.


20140422-115854.jpg
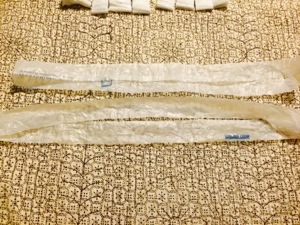
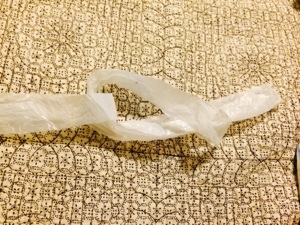
Step 5: Connect the strips by inserting one strip into another.

20140422-115951.jpg
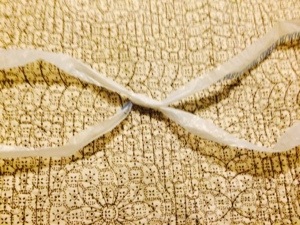
Put one end of a strip into the loop at the other end

20140422-120130.jpg
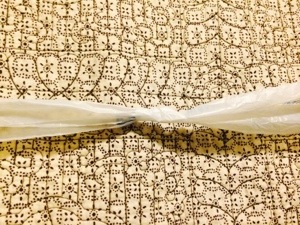
And pull tightly, but not too tightly or the plastic might pull apart.

20140422-120220.jpg
Not you have a doubled strand of plarn!


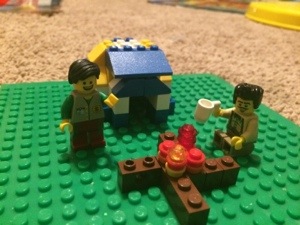
Camping outside


Spring has finally sprung and this girl is ready for some out-door activity. I have been cooped up in the four walls (well maybe more than four) all winter long, and it was a long one let me tell ya! This winter didn’t seem like it would ever end, we had a record number of snow days this year.

No more shall we suffer through another cold icy night with nothing to warm us but the fire. Ok, so that only happened one time, but still…it makes you appreciate the fact that you crochet warm fuzzy things. Am I right?

My husband and I have talked about taking my son camping before, but the idea of a small toddler toddling around an open flame just didn’t sit well with us. We put it off. I think the best starter would be a hiking day, and then after a few of those we can think about camping. THE GREAT OUTDOORS, HERE WE COME!!

And yes, I will be taking my hook and yarn…no electricity needed for that!

20140421-102834.jpg

Headgear

Covering the ears is one if my main goals when making any kind if head wear. I think it stems from being a kid; I always had to have my ears covered, even in the bath tub because of my frequent ear infections. I do it to my son too, “Cover those ears!”
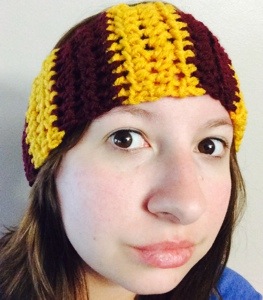
I recently made a batch of requested head wear for a few folks and one of them is a headband. I know I’ve talked about headbands already, but this one is my own pattern so I thought I would share with you how to make your own. It is a great ear warmer!!

The materials that you will need are:

H hook

Worsted weight yarn, two colors if you want strips like mine

Scissors

Yarn or tapestry needle


Here’s the pattern:
Ch 10
Row 1: HDC In third ch from hook and HDC in each ch across, ch1 and turn (8HDC)
Row 2: HDC across, ch1 turn.

Continue until you reach the desired size to snuggly fit around your head. When the desired length is reached do not tie off! Simply ch1 and turn the work as if you are going to start another row, but instead hold the two ends together and slip stitch across. Then tie off the end and weave in ends. If you want stripes like mine, I switched color every third row. To ensure a smooth color change make sure you finish the last stitch of the row before you intend to switch by pulling up the new color when you have two loops on your hook.

Happy crocheting!
20140420-084011.jpg

Pattern Round Up: Scarves

With the Spring season quickly descending up on us and Winter trying to make a break for it for the year, it is almost time to put away those cold weather clothes. Get those heavy coats, mittens, sweaters, hats, and so on that will go without use for the next several months and stuff them in a box to go in the top of the closet. Here in my part of the country, however, winter has a hard time making up its mind about whether it is gone or merely playing possum. So, since we are still having some nippy weather for the time being, let us take a look at a few scarf patterns that will do well in the chilly, yet not icy, weather.

One Skein Quick Crochet Scarves: from YARNGEAR. This is not a very thick scarf so it is good for the transition between seasons. Also, It would be quick to work up so it can be used for the last few chilly weeks.

This Long Crocheted Scarf: from Drops Design. This scarf is absolutely beautiful and I would love to make one, it’s just one of those projects I never seem to find time for. It would be perfect for a cool spring night around a camp fire. mmmmmm camping….

Shore Thing Scarf: from Red Heart Yarn. Again, this is a nice, thin scarf. Very light weight. Not so thick it will be too bulky, yet enough to wrap around a time or two to block the wind from your neck.

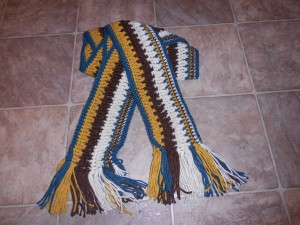
Taffy Pull Scarf: by Red Heart Yarn. This was one of my first scarfs to make. It has an interesting appearance and looks more complicated that it is. It works up quick and can be made very colorful for spring. I’ve included a picture of my version of the Taffy Pull Scarf below.

DSCN0690


I’ve been every where, man

This week I went on a small family trip that took about four driving hours to each our intended destination. The little town we went to was tiny and had next to nothing in the way of entertainment, food options, or lodging. We visited this little hole in the country because my husband had just completed a thirteen week training program and he is finally finished so we went to see the finishing ceremony.
So, while I was in the middle of Nowheresville trying to kill time I, as any crocheters or knitter worth their salt would, found a way to kill some time by working on my crochet. As I was sitting in our little hotel room crocheting away I started thinking about this new movement if tagging public areas with crochet or knitting called yarn bombing. I, being the law abiding citizen I am, have never been brave enough to do something so bold. But I have seen some work put up by others, and it always seems to brighten its surroundings. So since I am too chicken to doing my own yarn bombing (kudos for thinking about it though!) I want to tip my proverbial hat to those crocheters and knitters out there that have participated in such a beautiful and thrilling task. May your works of art forever brighten our world!

20140412-142746.jpg

Use the force

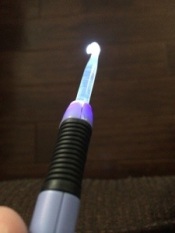
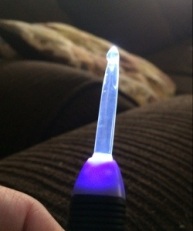
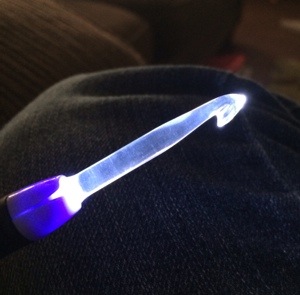
I have been reading some of those “coolest weird things ever invented” and I thought I would share my “cool weird” crochet hook that I bought a few years back. My favorite crochet hooks, as you may have read, are the Clover brand ergonomic hooks. They are just so comfy to work with, and my hand doesn’t cramp up like out does with the pencil thin hooks. One day I wanted to start a new project but couldn’t find my H size Clover hook. Imagine my sadness when I went to my local hobby store and couldn’t find a replacement. What I did find however, is a light saber type hook called The Crochet Lite. This nifty little thing has about the same size handle as my beloved Clover hooks with a comfy grip. Also, IT LIGHTS UP! How cool is that? I can’t say that I have found much practical use for the light, except one bought of crocheting while waiting in the car for about twenty minutes around sunset. Once it got completely dark though, it didn’t light enough of an area to feasible work with. Too much eye straining.
So, there is my contribution to the list of cool weird inventions. I’m Star Wars sure somebody somewhere was watching  while crocheting a blanket in the light of the movie and suddenly thought the idea if a light saber crochet hook would be awesome.

20140410-105608.jpg20140410-105617.jpg

20140410-105632.jpg